Installing Statelake
Introduction
Statelake is Flow Software’s purpose-built application for business data integration – integration is also known as EDI, an acronym meaning Electronic Data Interchange, or ETL, meaning Extract, Transform, Load.
Statelake can be used by organisations in any industry, and of any size. Statelake is particularly relevant to organisations with data management requirements across multiple applications or databases, organisations who have trading partners interested in exchanging data electronically, or where organisations may be seeking to minimise reliance of manual re-keying of data to improve accuracy and productivity.
Installation of Data Management Utility (server)
Statelake supports the use of both MySQL and Microsoft SQL Server. Either of these must be installed and accessible for use by Statelake. Please ensure that you have the appropriate access rights and log-on credentials.
Installation Of Statelake
Please contact Customer Support to obtain the Statelake installation file.
Run this installation executable file by double‑clicking on the file in Explorer.
Respond to the question from User Account Control for permission to run the application and make changes to your device - clicking on No will return you to file explorer, while clicking Yes will proceed, and the Setup – Statelake window will appear momentarily.
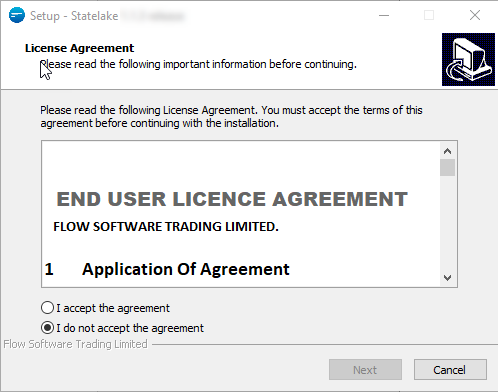
This first window contains the End User License Agreement, which you should read carefully. The End User License Agreement is contained in a fully scrollable window. There are two choices - clicking on the “I accept the agreement” radio button will activate the Next button and allow you to proceed.
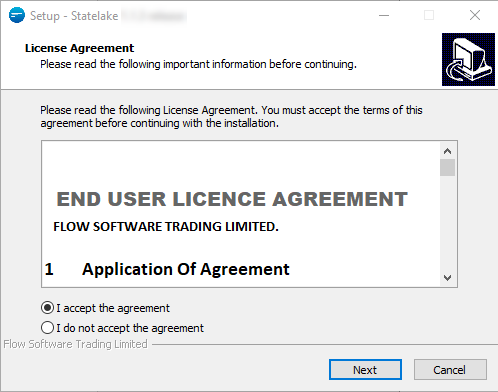
Clicking “I do not accept the agreement” will not activate the Next button radio button, and the only option will be to click Cancel and exit the setup.
Having selected “I accept the agreement”, on the next screen you will then be prompted to provide the destination location for the Statelake files in the Select Destination Location window.
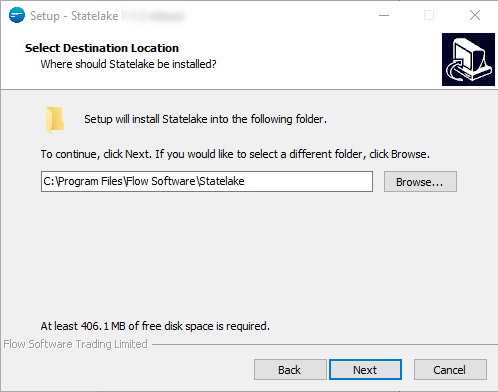
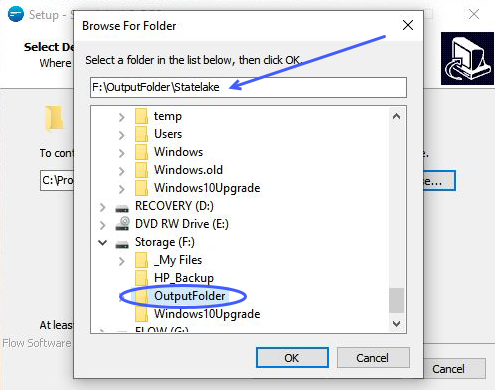
The default directory of C:\Program Files\Flow Software\Statelake will appear in the folder name field, but this default folder can be changed as required by clicking on the Browse button and selecting the appropriate folder.
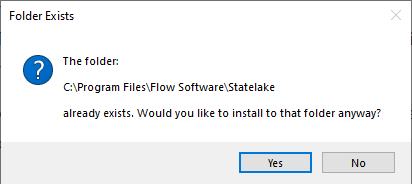
Statelake expects to create a new folder for the installation. If your chosen sub-directory already exists, then you will be asked to confirm your selection. Proceed as required.
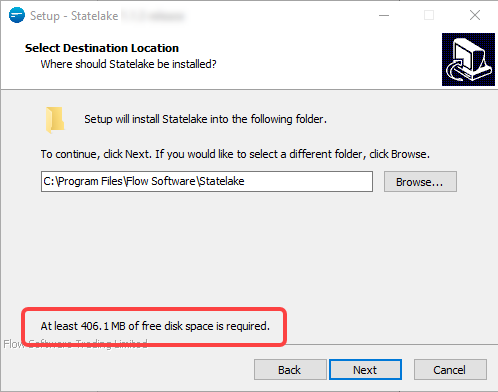
However, it is recommended that the default directory is accepted. Information will be displayed advising about the amount of free disk space that is required for the installation, to ensure that a folder is selected that has more than the required free space available.
Be aware that the amount of free disk space required may vary - depending on the version being installed.
Clicking Back will return you to the previous screen.
You can click Back at any stage during the setup to return to a previous window.
Just as clicking Cancel at any stage stops the setup.
Once you are satisfied that the correct folder has been selected, click Next. If the folder you have selected already exists, then a message will appear requesting confirmation to continue. To change the folder name, click Back to return one window and select a different folder.
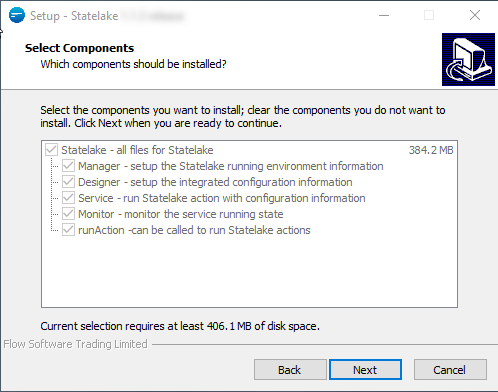
The next window Select Components displays the default components that have been ticked for installation - the display is a courtesy only as the default selection is not able to be changed. All components are installed by default:
· Manager – setup the Statelake running environment information
· Designer – setup the integrated configuration information
· Service – run Statelake action with configuration information
· Monitor - monitor the service running state
· runAction – can be called to run Statelake actions
Click Next to continue to the following window, Select Additional Tasks, where you will be prompted as to whether a desktop shortcut is to be created.
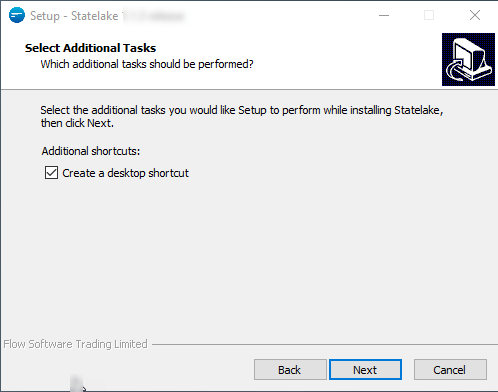
A tick in the box will create the desktop shortcut. As this is recommended, the default is to have this box ticked - untick the box when no shortcut is required. Then click Next to continue.
Statelake is now ready to be installed, and a summary detailing your selections is displayed in a scrollable inner window.
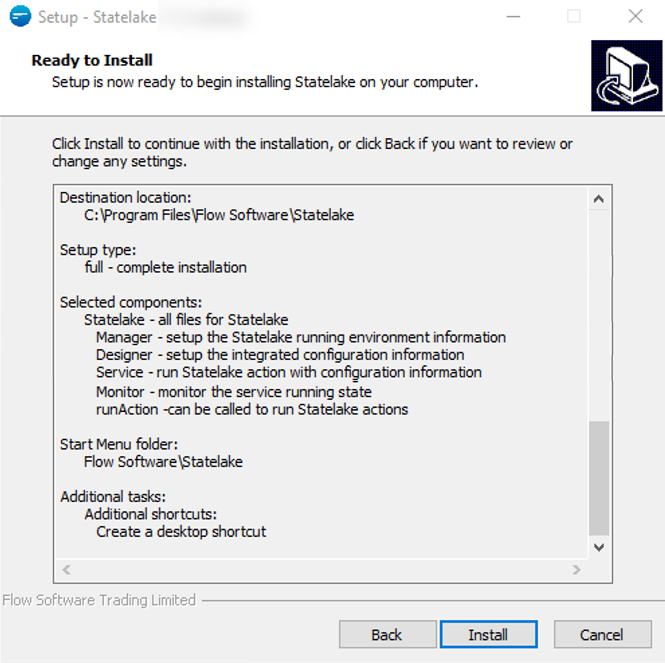
If any changes are to be made, select Back now as many times as required and re-enter the corrected details, or click Cancel to halt the installation. Clicking Cancel to exit the setup procedure will generate a confirmation pop-up window.
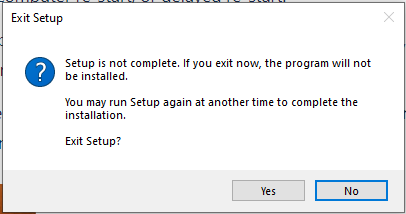
Selecting No will return you to the setup and continue with the installation, but selecting Yes will terminate the setup procedure.
To continue with the installation of Statelake as shown, click the Install button.
The installation process will now commence and once complete, the Completing the Statelake Setup Wizard window will appear.

Either select an immediate computer re-start, or delayed re-start.
Click Finish to exit the setup procedure - the computer will either re-start or not, depending on your selection.
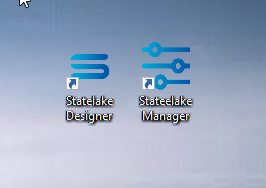
By the end of the setup, the Statelake shortcuts (if ticked) for Designer and Manager have been created and are now visible on the desktop, as shown below. Re-label them as you see fit.
A series of sub-directories have been created, and files extracted and installed into the selected installation folder - such as the default path of C:\Program Files\, along with the default C:\ProgramData\ for the Statelake data files.
For a list of these folders (sub-directories), please refer to Directories.
The Statelake software license has been installed in C:\ProgramData\FlowSoftware\Statelake\Config\.
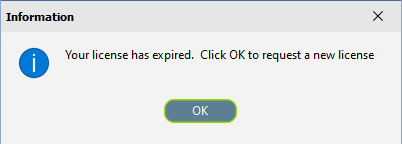
Statelake will not run with an invalid or expired license, as illustrated below. If you receive this message while trying to access Statelake, please contact Customer Support.