New Configurations
Configurations are the heart of Statelake. And every configuration must have access to a valid database that can be found on your selected host server, so before proceeding with setting up a configuration, the database must first be created and saved on your nominated host.
A Configuration Database can also be known simply as a Configuration, or a Config DB.
In Statelake Manager, a configuration database is a convenient interface window that prompts for the connection details to an existing database. The configuration databases identify the type of the host server (such as MySQL or Microsoft SQL server), the name of the Statelake database that has been set-up on that server, and the port to be used.
Once created, only one configuration can be accessed by Statelake Designer at one time. When a configuration is accessed through Statelake Designer, components such as Connections, Definitions, Maps, and Actions can be created, which provide access to the data contained in the specified database.
So there must be at least one configuration database set-up and available for selection.
Create New Configuration
To create a configuration database, Statelake Manager must be open.
On the left-hand side of the window, click on Config Databases. Any existing configurations will be listed, but for a new Statelake user or installation, this list will be empty as illustrated below.
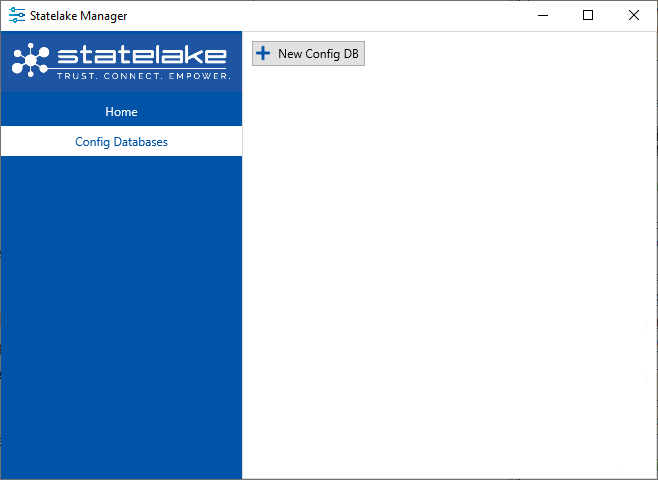
Click on the New Config DB button, and the Edit Config DB window will open, allowing you to identify the database and set the login credentials.
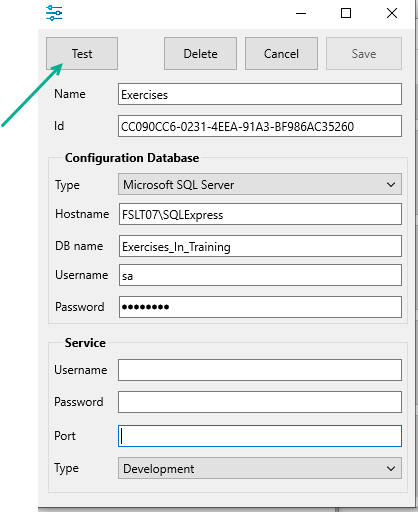
Name - the title that this configuration will be known by. This name can be whatever you like and can mirror the database name if that makes it easier. As long as the name is meaningful. It is simply the name of the menu item for this set of connection details.
ID - an auto-generated unique identifier, this field is fixed.
Under the Configuration Database section, Type is defaulted to Microsoft SQL Server. Select as appropriate.
The Hostname is the name of the server where the database is being hosted.
DB name – the name of database which was created on the server for this configuration to use. It is important to note that a Configuration Database should be linked to only ONCE across all of your Configurations. If a Configuration Database is accessed more than once, then it can interfere with the Statelake Service for the running of scheduled or monitored Actions.
Enter your server Username and Password.
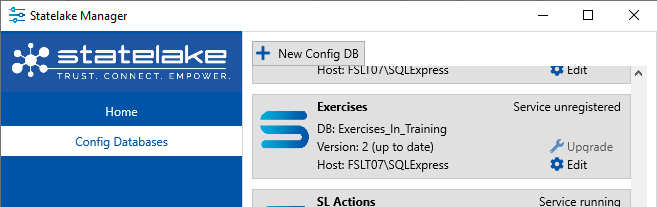
Press Test on the upper left corner of the screen to ensure that your selection is valid. In this example, a configuration database called Exercises has been set-up.
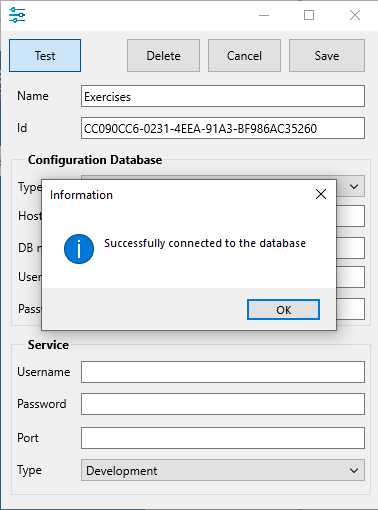
The system will attempt to connect to the specified database on your nominated host, with the credentials you have entered. A successful test will display a “Successfully connected to the database” message. If any of the information entered into any input field is incorrect, the test will fail. Click OK to close the message, and correct the fields as necessary. Then click on Test again until a successful connection has been achieved.
To check for incorrect entries, look at the studio connection data and check for any typing errors. Check to see whether CAPS LOCK is on, and make sure that the database name exists.
Service runs elements of a configuration as a background process. If a port value has been entered, then a Test must be performed again before you will be able to proceed. While this section may not be required, it is important to note that Statelake will check the validity of the Port upon Save. But ports cannot be duplicated, so if the Port value entered on the configuration is deemed to already be in use on another Statelake configuration, you will see the error pop-up “Current port has been used”, and Statelake will prompt for an automatically assigned and available port value to be selected.
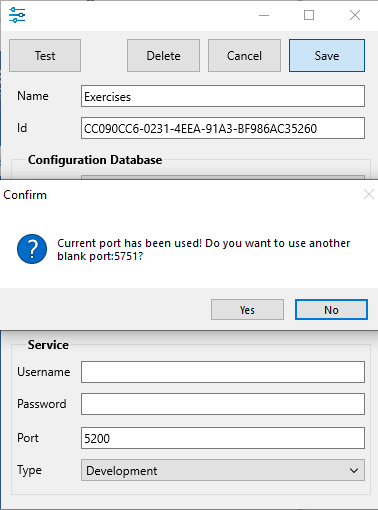
In a new configuration, the system will assign the default value 5000 to this field. If you are prompted to apply this change, click YES.
Once a successful test has been confirmed, click the SAVE button. On SAVE you will see several windows pop-up dialog boxes – “Terminates Processes”, and “Service Control Manager Configuration Tool” twice. Reply YES to all 3. You will then return to the Manager window.
If Config Databases is still selected, the new configuration that you have just set up will appear in the list pane on the right-hand side of the window.
Once all the Config DB’s you require have been created or edited, click on Home on the left panel above Config Databases, or click the X to close Manager.
DO NOT create more than one (1) Statelake Config Database that connects to a single database.
As the Config Database in Manager creates a connection into an existing database, any components that are created through Designer will access the database.
It is important to understand that if you create a second or subsequent Config Database through Manager that is connected to the same database, then there could be serious issues. Essentially, the two (2) Config Databases will be a mirror of each other. If you delete a component from one, then it will disappear from the other.