"Hello World" Introduction
This page is your starting point to working with Statelake once installation is complete.
Access to Statelake is gained through Statelake Manager - the top-level, umbrella executable application that enables you to create new configuration databases; access existing configuration databases; open and run Statelake Designer, and Statelake Monitor.
Statelake Designer is the executable module that allows you to create, configure and maintain configurations which describe the data sources and destinations, mapping rules, and other aspects of the processes, as well as test and run Actions. Each Designer session connects to only one Configuration at a time, so that you can create, modify, and run the components only within that Configuration. To use Designer with a different Configuration the current session must be closed and a new one opened. Alternatively, it is possible, and quite common, to have multiple Designer sessions open at the same time, with each one connected to a single, but different, Configuration.
To illustrate how easy it is to use Statelake, this tutorial will get you started with a simple database, Configuration and Action.
Set Up The Database
While this introduction could use an existing database, it is preferable to create a new database, specific to this operation. You should use your database management utility to create this new blank database on your selected server.
You must have sufficient rights for your selected server. Typically, this will be at owner/admin level, so that Statelake can create Statelake specific tables, save components to those tables e.t.c.
Statelake supports the use of Microsoft SQL Server (via Microsoft SQL Server Management Studio (SSMS)), and also MySQL. Both sets of instructions for this tutorial follow. Select whichever one is applicable for your situation and environment.
SSMS allows the use of blank spaces within the database name, but MySQL does not. If a space is required with the database name in MySQL, use a dash or an underscore to provide separation.
It is impossible to cover all possible errors that may come from a database connection because errors are specific to the type of the database, and each database type may have hundreds of errors that can be generated. If you do not know what the error is, then try searching the web for documentation about the errors for the type of database, and database management utility you are attempting to connect with.
SQL Server technical documentation - SQL Server | Microsoft Learn
Create A New SSMS Database
This configuration database will hold information pertinent only to this Hello World introduction.
Open Microsoft SQL Server Management Studio.
The Server type is Database Engine, and this field is fixed. Server name is the SQL installation local instance name. For SQL Server, this name should default to <YOUR‑COMPUTER>\SQLEXPRESS, but you will need to enter whatever the instance name is. Enter your login and password, and select Connect.
The Object Explorer screen will open, with a file structure running down the left margin. If you want to see what databases currently already exist, you can expand the selection by clicking on the plus symbol beside Databases, but this is not essential.
Next, right-click on Databases, then select New Database from the drop-down selection. The New Database window will open.
Enter Hello_World as the Database Name in the larger right-hand panel. You will see that “Hello_World” is automatically populated as the logical name in the database files that show as being created in the lower section of this panel. Click the OK to save.
Do not click the Add button. Using Add will create a data file which is not necessary.
A successful completion will return you to the Object Explorer screen. To confirm the presence of the configuration database you have just created if it does not display immediately, navigate to Databases and right‑click on Refresh on the drop-down menu. Hello_World should now be listed as a valid database. It’s as easy as that!
Your newly created database may initially be displayed at the bottom of the list of databases, but when the list is refreshed it will be listed alphabetically.
Close Microsoft SQL Server Management Studio (SSMS).
Create A New MySQL Database
This configuration database will hold information pertinent only to this Hello World introduction.
Open MySQL Workbench.
The instances that are available to you will be displayed on the left side of the window. Select and click on the local instance name required to open the instance. If, during installation and configuration of MySQL, it was chosen to save the password in the vault, then you will not be prompted for a password, and the main Workbench SQL Editor screen will simply open. However, if a password is required, then the Connect to MySQL Server window will pop-up requesting a password be input.
The pop-up will display the Service name - MySQL@<hostname>
User - the user account name for the selected instance will be displayed
Password - enter the relevant password.
There is a tick-box labelled Save password in vault below the password field which will allow you to save the password as entered to the MySQL vault, so that future sessions will not require input of a password. Tick this option only if appropriate, else leave it unticked to force a password to be entered every time.
Click OK to continue.
The Workbench SQL Editor main screen will open with 2 main tabs - Home indicated by a house symbol, and a tab labelled with the instance name. This instance tab will present a screen broken into 5 separate and distinct areas. Menu options will appear in the left strip under Navigation, above an Information area. An open tab labelled Query 1 and a tab labelled SQL Additions take up the rest of the screen, will an Output area displayed on the lower portion of the window. and is split into 3 areas. Click on the first line labelled as 1 under Query1, and type in Create Database Hello_World.
Highlight Create Database Hello_World that you have just entered on the line, and click on the Execute lightning bolt symbol (3rd from the left) found directly in the menu line above. A message “1 row(s) affected” will appear in the lower Output pane, indicating that the database has been created. If the database name already exists, a message will appear in the Output pane advising that the database was not created as a duplicate. Correct the database name on line 1 and execute again.
Click on Database on the menu line under the instance tab, then select Connect To Database. A new window will pop-up.
Select from the drop down list for Stored Connection - select the listed instance name. This should be the same name as that displayed on the Workbench.
Leave Connection Method as defaulted.
There are 3 tabs - Parameters, SSL, and Advanced. We are only interest in the Parameters tab at this stage which will be active and highlighted. Leave the Hostname field, and the Port ,as defaulted. Leave the Username field as defaulted unless you are wanting to have this under a different user.
If the Password is to be stored in the MySQL vault then leave as defaulted, else click Clear to erase any password.
Enter the database name Hello_World into Default Schema.
Click on OK. If you cleared the password, you will now to be prompted to enter the password.
A new tab will open, labelled as Mysql@<Hostname>.
Close MySQL.
Set Up The Configuration DB
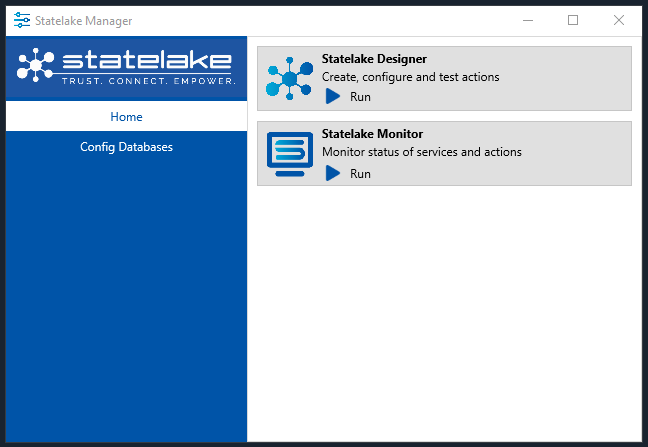
Open Statelake Manager. Statelake Manager is the top-level, umbrella executable application that enables you to create new configuration databases; access existing configuration databases; open and run Designer, and Monitor.
Start Manager. The Manager icon should be located on your desktop, but if not, the executable Manager.exe can be found in C:\Program Files\Flow Software\Statelake. Double-click on the desktop icon or on the application to open and run Manager.
The Manager home screen window will open. It is split into 2 distinct parts. On the left side are the selection bars for Home and Config Databases, and in the right panel the options for each selection are shown.
We first need to create a Statelake configuration specifically for this Hello World introduction, using the database Hello_World that we have just created.
Create A New Configuration Database
On the left-hand side of the Manager window, click on Config Databases. If this is the first Config Database then the list will be empty, else any other existing configurations will be listed. For this tutorial, we will create a new one.
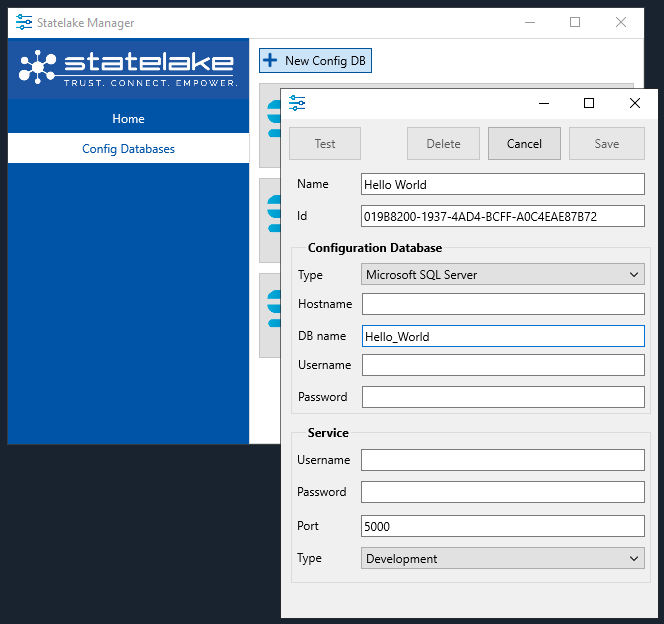
Click on the New Config DB button, and a new window will open, allowing you to identify the database and set the login credentials.
Name - the meaningful title that this configuration will be known by. The default is New Config DB. Overtype or delete this text, and enter Hello World.
ID - an auto-generated unique identifier, this is fixed.
Under Configuration Database, select the Type from the pull-down menu. The default is Microsoft SQL Server. MySQL is available on the drop-down box. Select whichever is appropriate.
The Hostname is the name of the server where the database is being hosted and is the server name. For SSMS it will be the name that was entered during the login to Microsoft SQL Server Management Studio. So you would enter the appropriate name which would be either <YOUR‑COMPUTER>\STATELAKE or <YOUR‑COMPUTER>\SQLEXPRESS. For MySQL connection, enter the Hostname as entered during creation of the database.
DB name – the name of database which was created on your host server for this operation. In this case it is Hello_World.
Enter your Username and Password, as used with your host server (Microsoft SQL Server or MySQL).
Although Port and Type are under Service, it is necessary to select a port and Type before proceeding further and testing the connection.
Port - the Port should be a unique number for the machine running the configuration. In a new configuration, the system will assign the default value 5000 to this field, and in this case, we will be attempting to save the configuration with this default value.
Type - select the appropriate Type from the pull-down list. For this tutorial, select Development.
Press the Test button to ensure that your selection is valid. You cannot Save the configuration until you have run this test procedure. The system will attempt to connect to that database on that host with the entered credentials. A successful test will display a “Successfully connected to the database” message. However, the test will fail if the information in any field is incorrect. Click OK to close the message. Correct any fields as necessary, then click on Test again.
As a check for incorrect entries, look at the server connection data and check for any typing errors. Check to see whether CAPS LOCK is on, and make sure that the database name exists,
Service runs elements of a configuration as a background process. It is not necessary to enter the details for the service for this tutorial.
Click the SAVE button at the top right of the screen. Statelake will check the validity of the Port upon Save. The Port should be a unique number for the machine running the configuration. It is an arbitrary number that is not in use by any other system process, utility or common program. It is recommended that a number over 5000 is selected. Unique numbers must be selected for each configuration, such as 5000 for a production port and 5001 for a test port. But ports cannot be duplicated, so if the Port value entered on the configuration is deemed to already be in use on another Statelake Configuration, you will see the error pop-up “Current port has been used”, and Statelake will prompt for an automatically assigned and available port value to be selected. In a new configuration, the system will assign the default value 5000 to this field, and in this case, we will be attempting to save the configuration with this default value. For this tutorial use 5002. If you are prompted to apply this change, click YES.
Click through any User Account Control windows that may pop-up on Save. Then you will return to the Statelake Manager window.
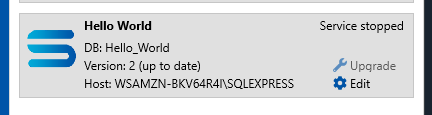
If Config Databases is still selected, the new configuration that you have just set up called Hello World will appear in the list pane on the right-hand side of the window.
Click on Home on the left panel above Config Databases.
Designer
The two options that appear under Home on the right-hand side panel are Designer and Monitor. Click on Run under Designer.
The Database Connection
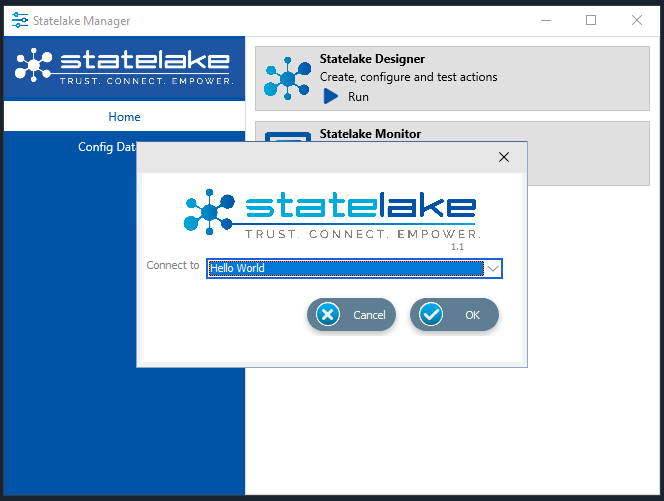
Once you have clicked Run, the Designer pop-up window will prompt you for the name of the configuration you want to connect to and open.
Connect to - select the newly created configuration Hello World from the pull-down list. Click OK.
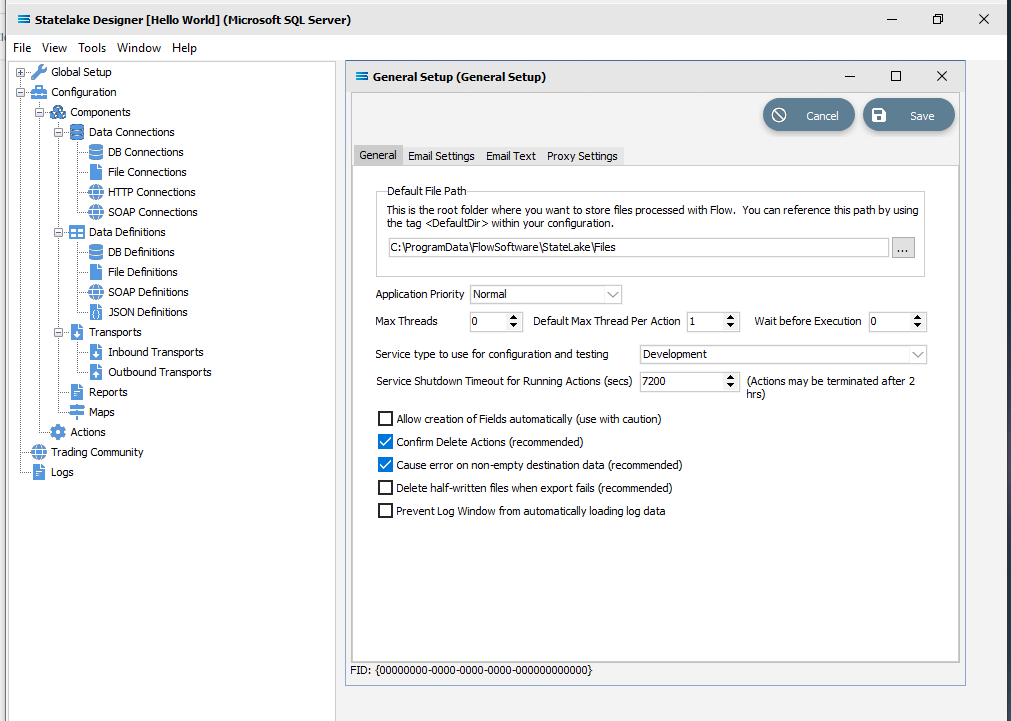
The Statelake Designer window for the Hello World configuration will display, and the General Setup window will open automatically. Accept all defaults and click Save.
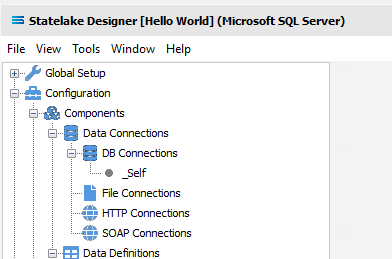
On the expanded structure tree follow the path Configuration > Components > Data Connections > DB Connections. Click on DB Connections to expand the menu and you will find that one preloaded DB Connection has been set-up by the system, called _Self (underscore Self). This is the DB Connection that we will use. There is no need at this stage to open it.
The Database Definition
The expanded structure tree is displayed on the left side of the screen.
Follow the path Configuration > Components > Data Definitions > DB Definitions. There will be no plus or minus symbol beside this item, indicating there are no current definitions set up. Right‑click on DB Definitions and choose New from the drop-down list. A New DB Definition item will appear in the menu tree and the New DB Definition window will open.
In the New DB Definition window the following information is to be entered.
DB Definition Name – the name that is meaningful and best describes the query/extraction. Erase and over-type the default in this field by highlighting the existing text. For this exercise we will use Hello World XXX. Where XXX is your name . . . so if your name was NIGEL for instance, the name in this field would be Hello World Nigel.
DB Connections – this is the name of the source database, identified by the meaningful name that was given in the DB Connections module. Right-click anywhere in the blank box to see the Add pop-up, and a list of all the found connections will be displayed. Select the one you want from the list – in this tutorial, it will be the only option which is _Self.
If you select an incorrect source, double-click on the name in the DB Connections box to de-select it,
c. All other fields – leave with the defaults as set.
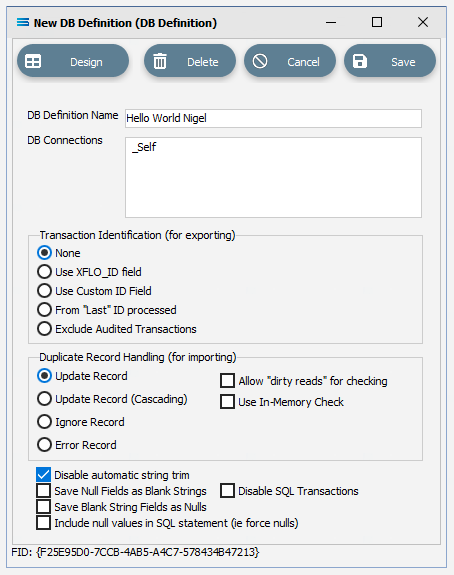
Click Save in the top right of the window. You will return to the DB Definition window.
The DB Definition named Hello World XXX will now appear in the structure tree under Configuration > Components > Data Definitions > DB Definitions, replacing the defaulted name of New DB Definition.
The Action
The expanded structure tree is displayed on the left side of the screen. The last branch under Components is Actions.
Follow the path Configuration > Components > Actions. There will be no plus or minus symbol beside this item, indicating there are no current Actions set up. Right‑click on Actions and choose New from the drop-down list. A New Action item will appear in the menu tree and the New Action window will open.
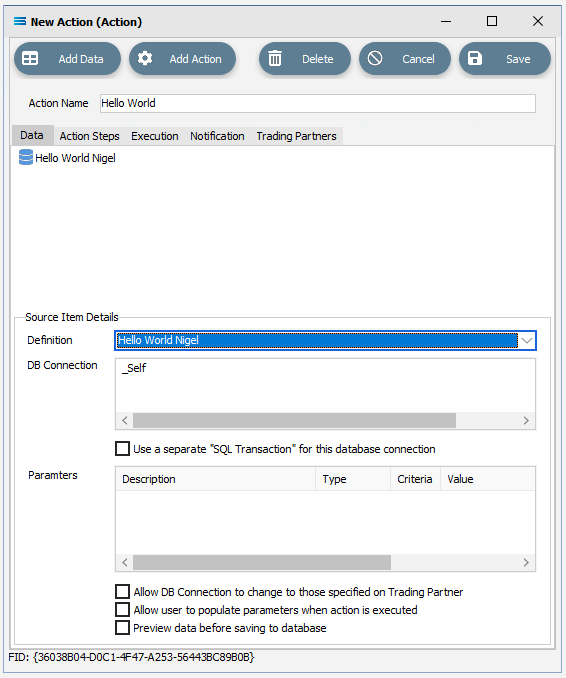
In this New Action window, remove the default entry and enter the Action Name as Hello World.
There are several tabs. The first tab is Data, and to enter information into this area, click on the Add Data button on the top left, and select DB Definition from the drop-down list.
New DB Definition Item will appear under the Data Tab. Click on it once, and the lower portion of the panel will appear with fields under Source Item Details.
Click into the blank Definition field, and select your definition Hello World XXX from the pull-down list. Once selected, the DB Connection field will automatically populate with _Self. Leave all other fields as defaulted.
To enter data into the next tab Action Steps, it is not essential to click on the tab to open it. You can just click on the Add Action button. Select the very last item on the drop-down list - Custom Script Action.
New Custom Script Action Item will appear under this Action Steps tab. Click on it to bring up the related fields in the lower part of the panel. The radio button DB Definition should be selected by default but if it is not, then select it.
Click on the pull-down arrow for Source Data, and select Hello World XXX.
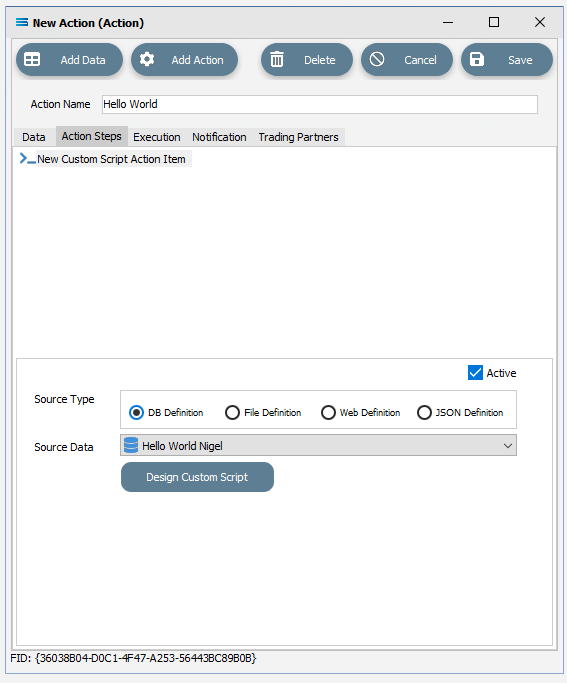
Click on the Design Custom Script button. .
The Script Editor window will open. Do not be intimidated – it is split into 3 primary panels.
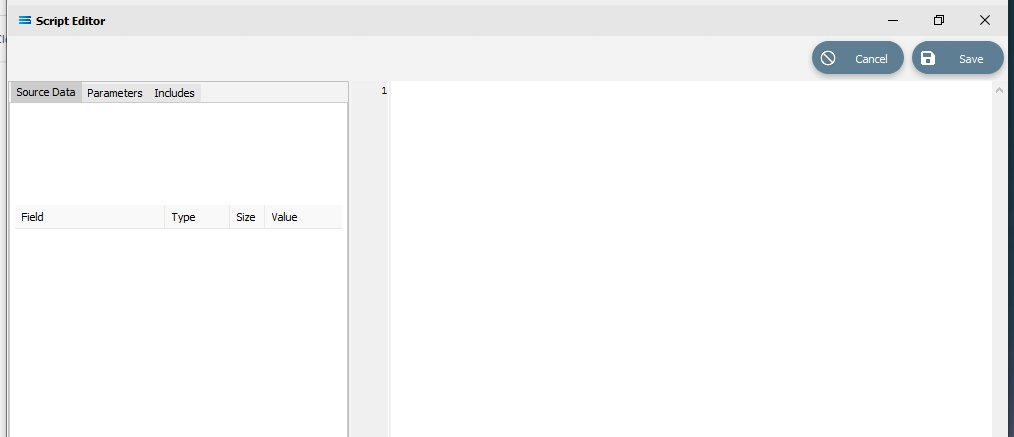
The largest right-hand panel may have been populated with a short 4-line script. If it is empty with just a number 1 on the left margin, just click into the panel to display this script.
procedureScriptEvent(varValue : variant);beginValue :=end;Replace the third line Value := with LogInfo(‘Hello World. I am here!’); . There is no space after LogInfo and the quotes inside the parentheses are single quote marks. Make sure that the semi‑colon ends the line as below.
procedure ScriptEvent(var Value : variant);begin LogInfo('Hello World. I am here!');end;Be mindful when generating this script. If you use an apostrophe as part of a word such as “can’t” or “don’t” in your text, then the apostrophe will not be recognised or interpreted by the system as you intended, and your script compile may fail.
Click the Save button in the upper right corner of the window to save your code and return to the New Action window.
Click Save to save the Action.
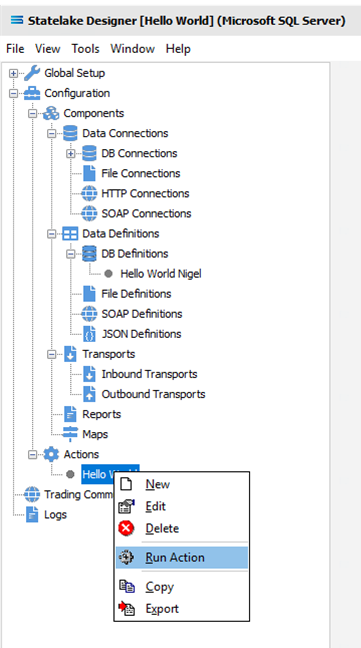
The Action called Hello World will now appear in the menu tree and will be available to run. Right-click on this Action and select Run Action from the list of available choices.
A list of the actions taken will dump to a screen window labelled Overview, showing you the steps taken. The sixth line displayed will be Hello World. I am here! under the line labelled User Info.
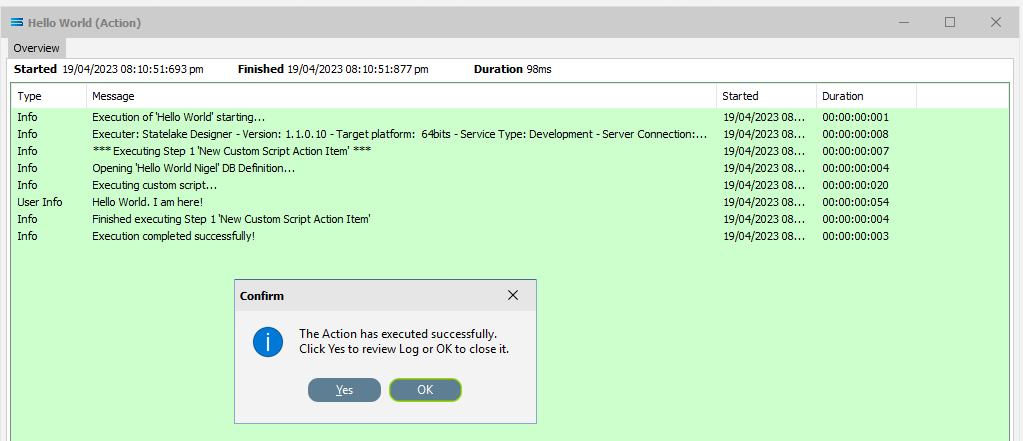
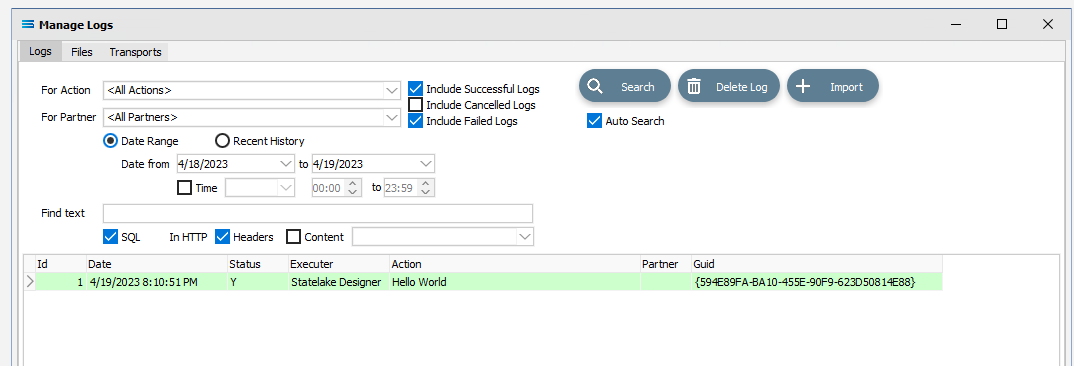
And when complete, a message “The Action has executed successfully” will display. Click Yes to review the log, or OK to close the message. The log is simply the dump that is already visible on screen. Clicking OK closes the window. The log entry for a script/action successfully completed will display with a pale GREEN background. You can run this Action as many as you like, and the log will record every instance.
When this screen dump has been closed, to review the log, click Logs at the very bottom of the expanded structure tree to open the Manage Logs window. To view the log, double-click on the log entry for the action instance that you want to view. Click the X in the upper right corner to close the log and X in the upper right corner to close the Manage Logs screen.
To close Designer, click the X in the upper right corner.
The End Result
Not only have you have successfully run a Statelake Action process step, you have also created a database and a DB Definition.
Quick Recap Quiz
I think you will agree that this was both easy and fun! Let’s see what you remember.
A single Designer session allows you to connect to how many configurations at one time?
a. Only one b. Two c. As many as you want
2. What sort of process is Statelake Service?
a. Foreground b. Background c: Interactive
3. What is the name of the DB Connection that has already been created?
a. _Bert b. _Ernie c: _Self
Next Steps
Congratulations on your completion of Statelake “Hello World” Introduction. I think you will agree that it was both easy and fun!
The next modules that follow in the Statelake tutorial series:
Tutorial 1 - Exporting Creditor Accounts Into A Flat File Supplier List
Tutorial 2 - Import Debtors Into A Custom Database
Tutorial 3 - Importing XML Purchase Orders Into A Database
Tutorial 4 - Extracting XML Invoices Out Of A Database
Quick recap quiz answers
a 2. b 3. c Great going!