Exporting Logs
Click on Logs on the structure tree to open the Module window.
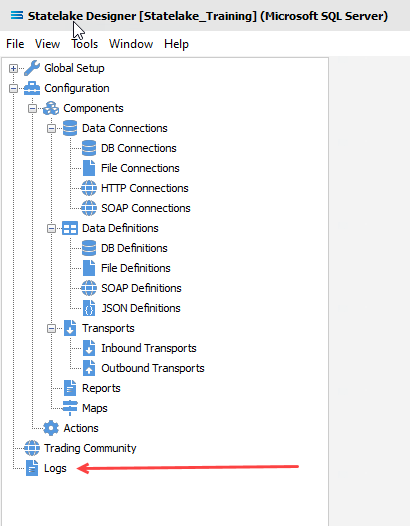
The Manage Logs window will open.
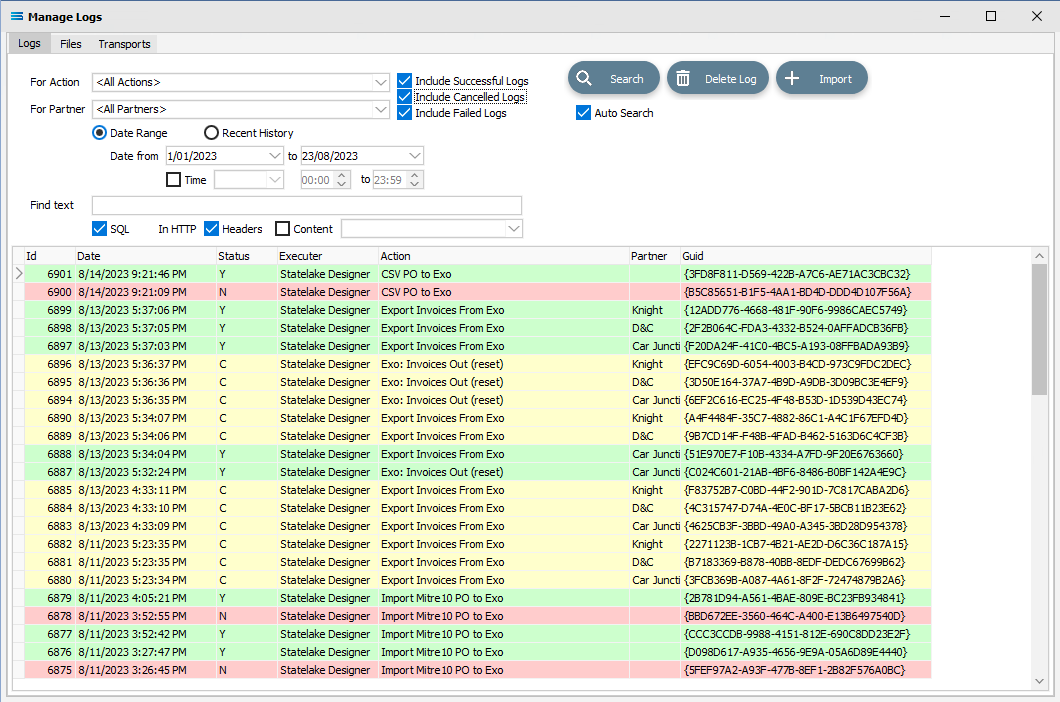
The Log entries that are displayed are selected through the filter criteria.
Any number of Logs may be exported at any one time.
Possible Import Action Options
Not all options will be available depending on the type of Export selected.
Option | Description |
|---|---|
User Decides at Import | The user is given the option to Import or not during the Import Process. A message will advise that the SL_CFG was modified and the import can either proceed or be cancelled. |
Add | The item is added to the configuration on Import. If the item already exists, then a new FID for the exported item is created, and that file is imported which creates two unique items with the same “friendly” name. |
Add or Replace | If it does not already exist, then the item is added to the configuration on Import. If an item of the same name does already exist, then the imported item replaces the existing item. |
Add or Ignore | If it does not already exist, then the item is added to the configuration on Import. If an item of the same name does already exist, then the imported item is ignored and not imported. This is the default option for Modules that interface with the “real world” such as DB Connections, HTTP Connections and SOAP Connections. This is the default used to stop any accidental over-write of a database or web reference. |
Ignore | The item is ignored and not imported, regardless of whether an item with that name exists or not in the configuration being imported into. An error message will display where this option is selected. |
Force Add | As with Add, but the item path is ignored and the item is saved to the root directory for the Module Type that is being exported. |
Force Add or Replace | As with Add or Replace, but the item path is ignored and the item is saved to the root directory for the Module Type that is being exported. |
Force Add or Ignore | As with Add or Ignore, but the item path is ignored and the item is saved to the root directory for the Module Type that is being exported. |
Ignore And Hide | While the Module item might be named in the list, it is to be ignored and not displayed or included in the Import. |
Export A Single Log
To select an individual Log, you must firstly highlight the Log entry so that the >> (double arrows) are displayed in the Id column.
Then right-click anywhere along the Log line to activate a pop-up menu.
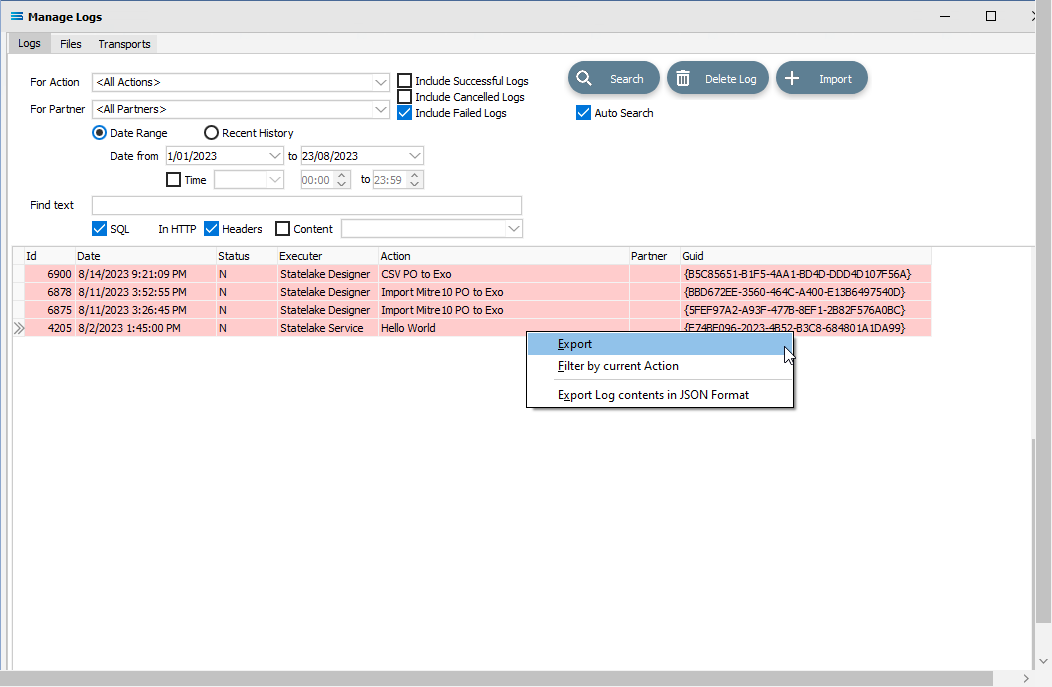
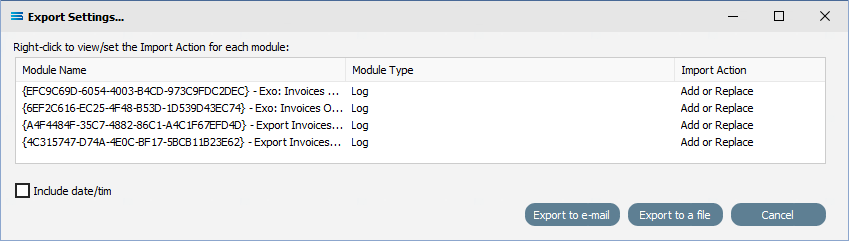
Select Export. The Export Settings window opens and displays the selected item. Each Log entry has its own unique FID that bears no resemblance to the originating Action, but it is the number as displayed under the GUID column in the Log. This FID is used to identify each particular Log record.
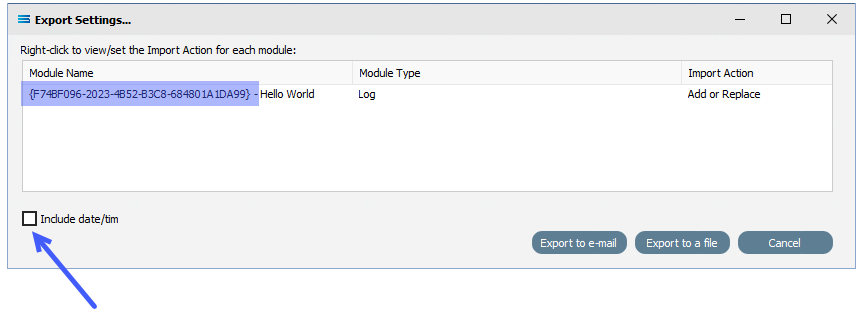
Ticking the Include date/time box on the lower left of the window will append the date and time stamp to the end of the file name to allow you create multiple files with the same file name, within the same directory of disk.
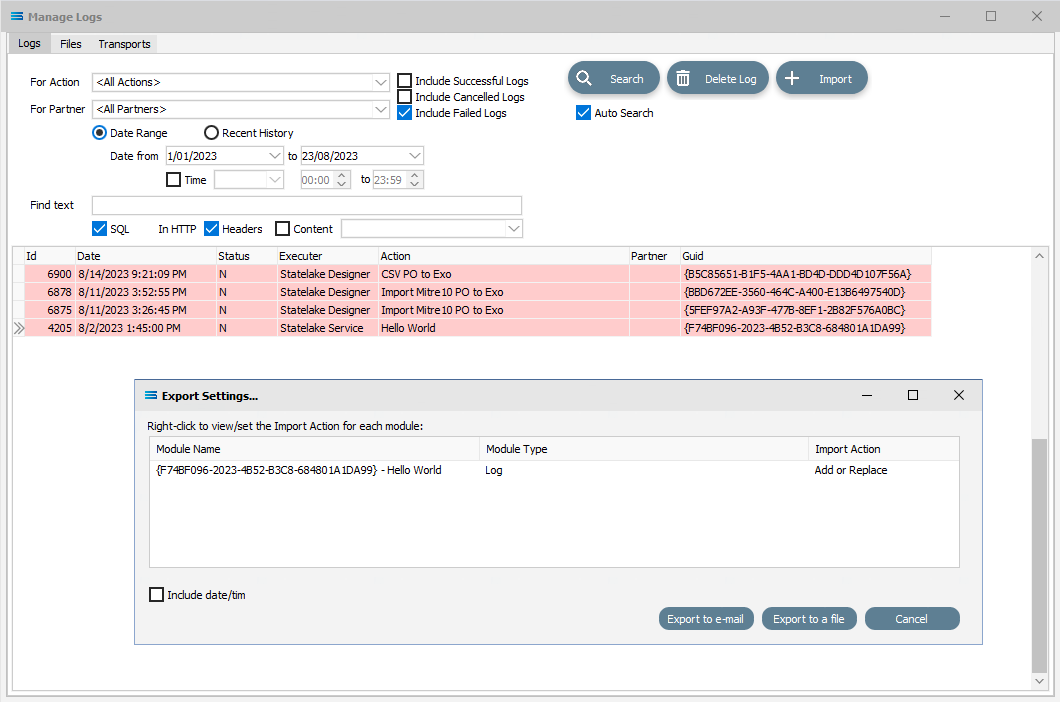
On this screen you are able to set the Import Action rules, by right-clicking on the item and selecting from the drop-down list of available options that could apply to just that individual item. The default is Add or Replace, although this setting is able to be changed by right-clicking anywhere along the line.
Buttons
Button Name | Description |
|---|---|
Cancel | Click to cancel any changes you have made. |
Export to a file | Click to export the item as an individual file. |
Export to e-mail | Click to export the item as an individual file as an attachment to an email. |
When the Import Action is set as required, selecting either Export to a file or Export to e-mail prompts you to choose a path and file name for your individual item exported files.
The default extension is .SL_CFG. The file name defaults to the name of the Statelake configuration, followed by - Logs.SL_CFG.

If the Include date/time box has been ticked, then this detail will be appended to the file name as below.

Navigate to the required sub-directory and make any change the file name. Select Save to continue,
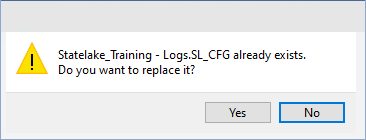
If the file already exists, then a message will display prompting confirmation. This message will not be activated where the date and time stamp are appended to the file name - at the very least, the time will always be different so it will be considered to be a different file.
A message will display once the file has been successfully saved.
A message will appear once the file has been successfully saved. The original items will remain untouched within the configuration.
Export Multiple Logs
To select multiple Logs, you must firstly highlight one of the Log entries to be exported. To add lines to the selection, depress the <control> key while you select other lines.
Selected lines will initially display a >> (double arrow) in the Id column. As you move from the line to select another, the >> will be replaced by a full-stop. The full-stop indicates that the line has been selected and is part of a multiple selection, but is not the current selected line. The current line will always have a >> in the Id column. When all lines have been identified, right-click anywhere along any of the identified lines to activate a pop-up menu.
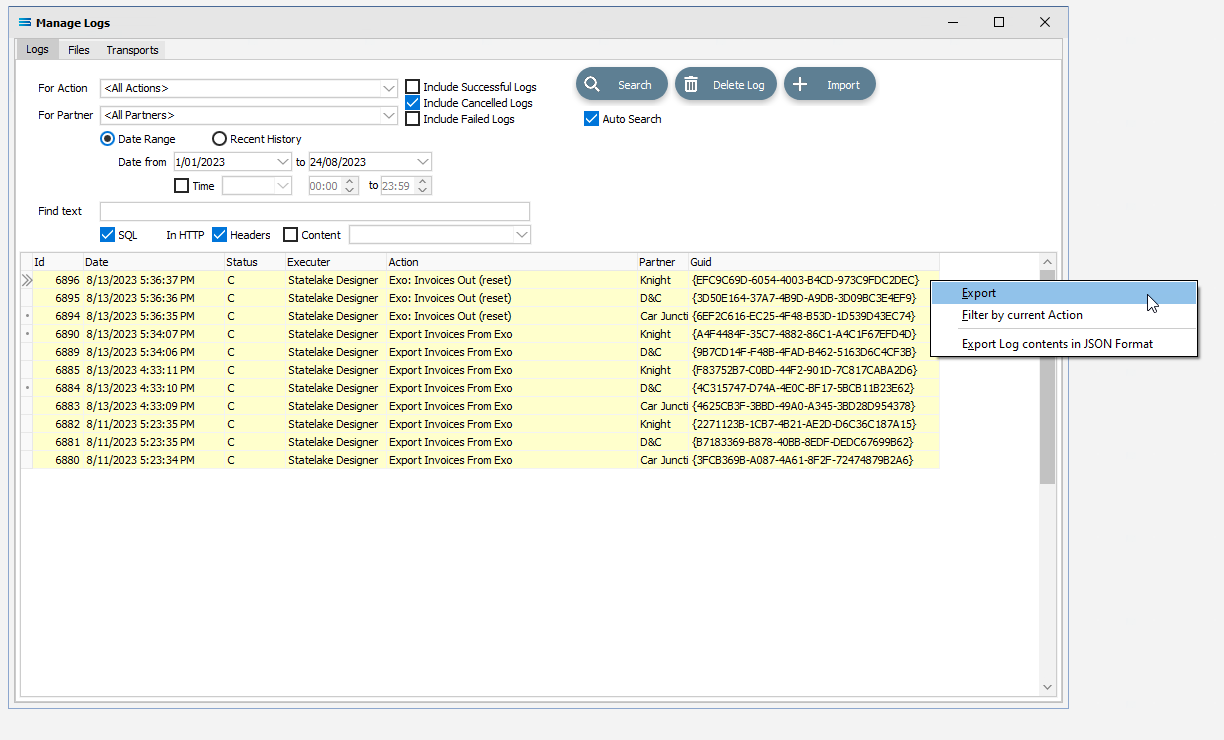
Select Export. The Export Settings window opens and displays the selected Log items. Each Log entry has its own unique FID that bears no resemblance to the originating Action, but it is the number as displayed under the GUID column in the Log. This FID is used to identify each particular Log record.
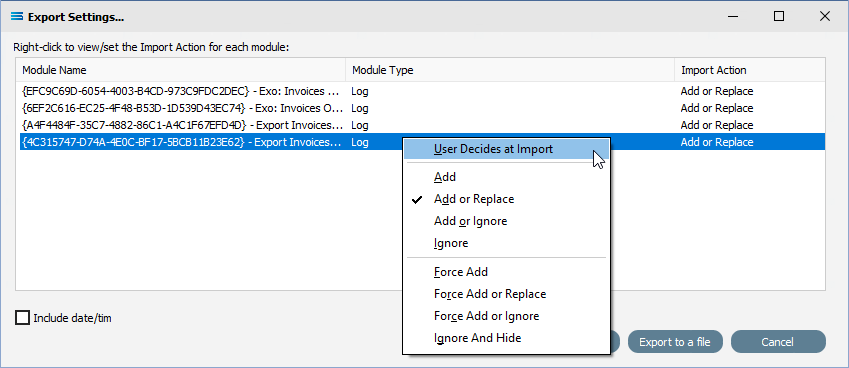
On this screen you are able to set the Import Action rules, by right-clicking on the item and selecting from the drop-down list of available options that could apply to just that individual item. The default is Add or Replace, although this setting is able to be changed by right-clicking anywhere along the line. The current option is shown in the pop-up with a tick.
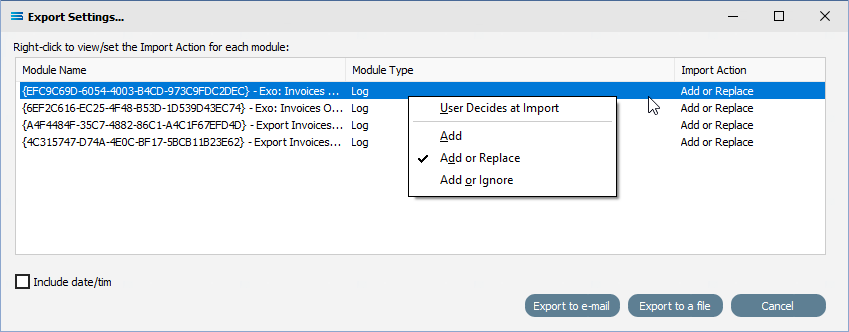
The primary (top) line will not have the same available options. You will only have the following for the top line - Add, Add or Replace, Add or Ignore, or User Decides at Import. This ensures that the exported file will never be empty.
Subsequent lines will have all options available as below.
Tick the Include date/time box on the lower left of the window to append the date and time stamp to the end of the file name to allow you create multiple files with the same file name, within the same directory of disk.
When the Import Action for all items to be exported are set as required, selecting either Export to a file or Export to e-mail prompts you to choose a path and file name for your individual item exported files.
The default extension is .SL_CFG. The file name defaults to the name of the Statelake configuration, followed by - Logs.SL_CFG.

If the Include date/time box has been ticked, then this detail will be appended to the file name as below.

Navigate to the required sub-directory and make any change the file name. Select Save to continue,
If the file already exists, then a message will display prompting confirmation. This message will not be activated where the date and time stamp are appended to the file name - at the very least, the time will always be different so it will be considered to be a different file.
A message will display once the file has been successfully saved.
A message will appear once the file has been successfully saved. The original items will remain untouched within the configuration.