Multiple Tables - Tables Tab - DB (Database) Definitions
Multiple Table Selection
Where more than one table is selected for the query, you are prompted to join the tables. Joining the tables means that you will have access to the data in all the tables that are joined.
Before starting to join tables, please make sure that you know what result you want from the join. This will determine how the tables are joined.
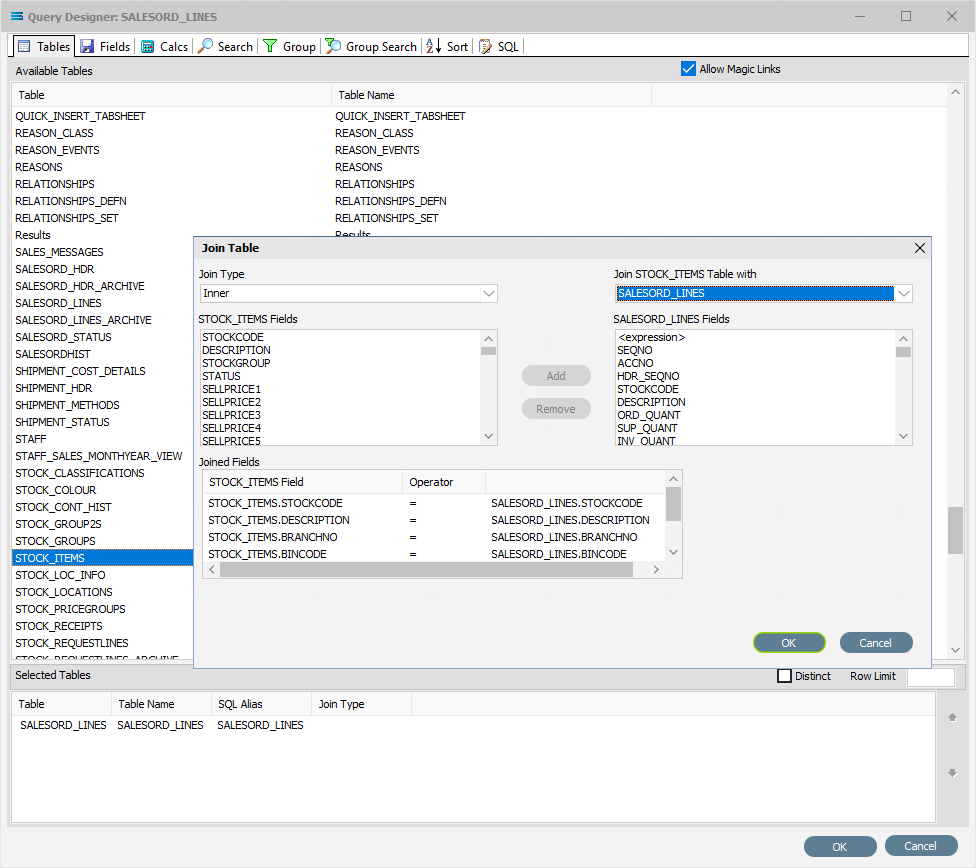
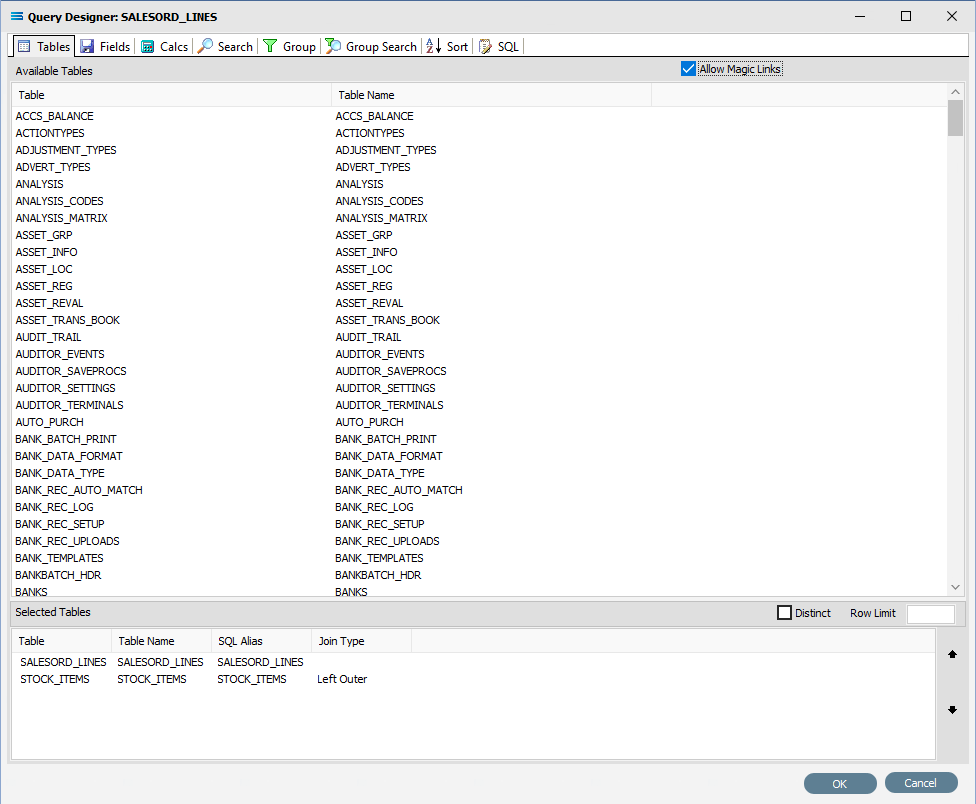
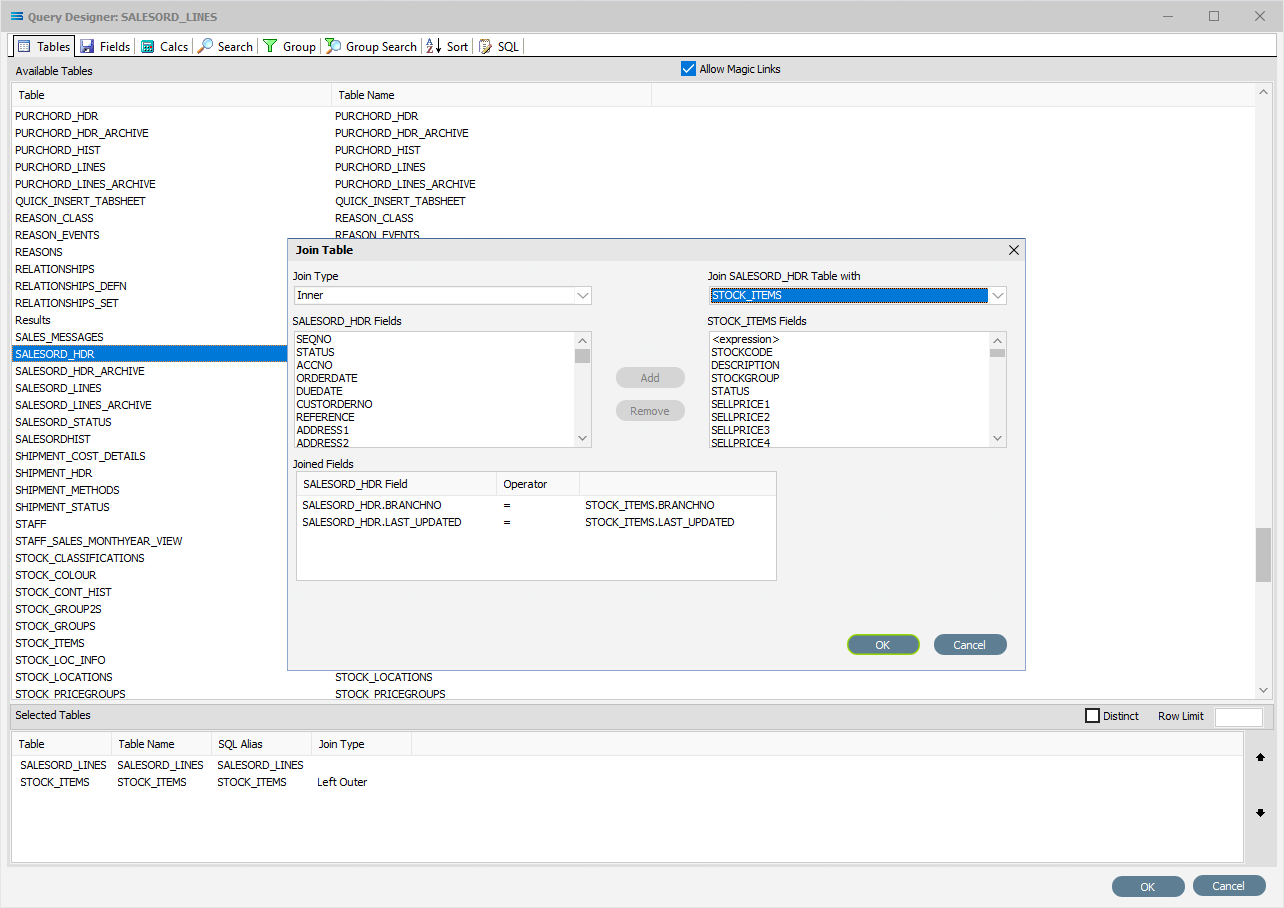
In this example, the table SALESORD_LINES has already been selected, and STOCK_ITEMS has been selected as an additional second table. As soon as you double-click on the 2nd or subsequent table, the Join Table window appears.
Fields
Field Name | Description |
|---|---|
Join Type | Specify the SQL join required. See below. |
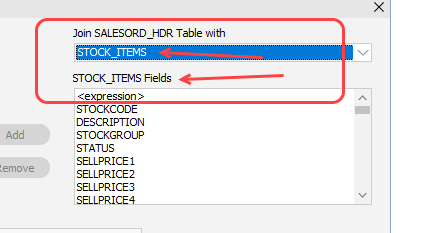
Join (xxx) Table With | Select which selected existing table (yyy) is to be joined to the newly selected table (xxx). |
(xxx) Fields | Fields available in the newly selected table (xxx). |
(yyy) Fields | Fields available in the selected existing table (yyy). |
Joined Fields | Defaults with suggestions for the links between the Fields from both tables. |
Buttons
Button Name | Description |
|---|---|
Add | Join the selected fields, and then Add them to the Joined Fields list. |
Remove | Click to Remove any already Joined Fields from the list. |
OK | Click to save any join changes you have made. All changes will be lost if you do not click the OK button. |
Cancel | Click to Cancel any join changes you have made. |
There are four (4) different types of SQL Join Type that you can choose from.
In the illustration below, the Left table is Table 1 (the existing table selected to be joined to), and the Right table is Table 2 (the newly selected table).
Inner Join - Returns records that have matching values in both selected tables.
Left Join - Returns all records from the Left table, and only the matched records from the Right table.
Right Join - Returns all records from the Right table, and only the matched records from the Left table.
Full Outer Join - Returns all records when there is a match in either the Left table or the Right table.

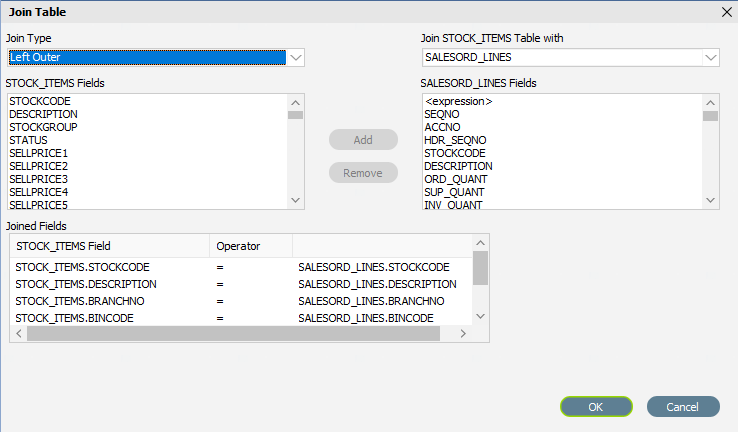
So in this example, SALESORD_LINES (yyy) is Table 1 and STOCK_ITEMS (xxx) is Table 2.
And because we are wanting to identify all the rows in SALESORD_LINES, and link any valid items from STOCK_ITEMS if they exist in SALESORD_LINES. So the Join Type would be a Left Join.
Select the Join Type and name of the table/dataset that will be known as Table 1 - the primary dataset (yyy). The fields displayed in (yyy) Fields will change, depending on the table selected.
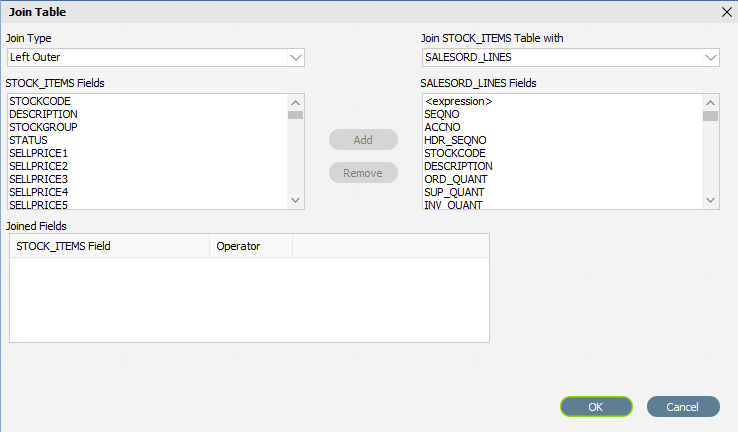
It is best to remove the suggested Joined Fields and re-link to your requirements to ensure there is no confusion or incorrect links.
Remove the Joined Fields either by highlighting the Joined Field to be removed and then clicking on Remove, or by double-clicking on the Joined Fields in the Joined Fields pane.
The linked or joined fields do not need to have the same common field name - such as SALESORD_LINES.COLOUR and STOCK_ITEMS.COLOUR for example.
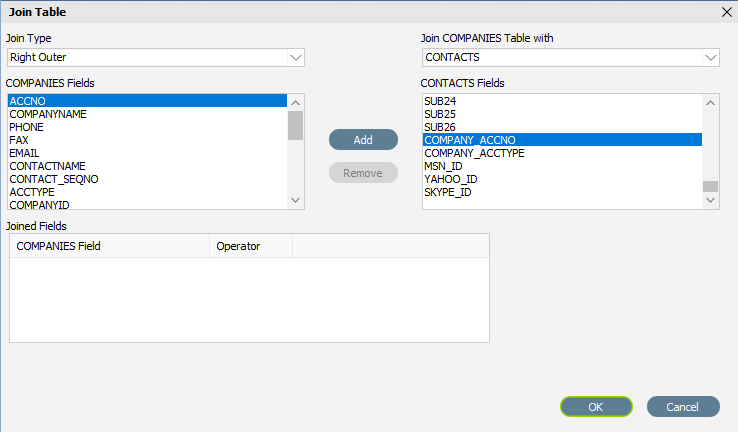
Any field in one table can be linked to any other field in the other table, regardless of the field name, as long as the data in those fields is consistent - such as the example below, COMPANIES.ACCNO and CONTACTS.COMPANY_ACCNO.
To join the tables, select a field name from each table - as below, the field SALESORD_LINES.STOCKCODE and STOCK_ITEM.STOCKCODE will be joined.
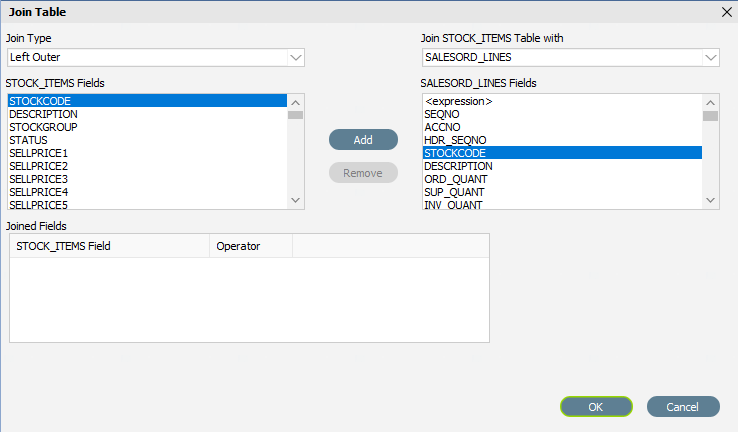
The Add button will be de-activated until the two (2) fields have been identified and selected. After highlighting a field from each table/dataset, then click on the Add button. The linked/joined fields will display.
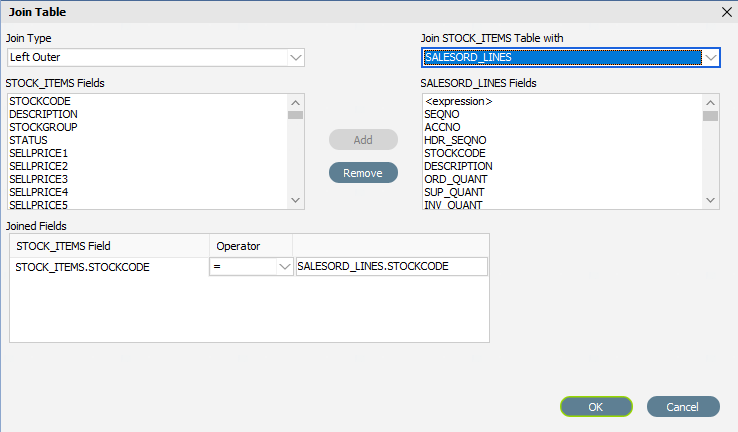
The Operator defaults to equals ( = ) but this is easily editable. To edit the Operator, simply click on the Joined Fields name, then click into the Operator column and select an option from the drop-down list. In this instance, the Operator will be left as the default.
Click OK to close this window if you are happy with your selection, else click Cancel to start over.
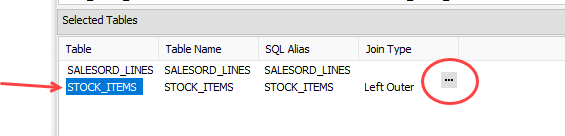
If you decide at this point that you want to change the details for one of the selected tables, click on the appropriate line, and then on the 3-dot ellipses that appears to the right of the line. This will bring up the Join Table window for that join, allowing you to change whatever detail is required.
To delete a selected table, even after it has been joined, simply double-click on it.
You can go on and join as many tables/datasets as you require.
You will not be able to save the query at this point with just the Table or Tables selected. To save, you must identify at least one Field.
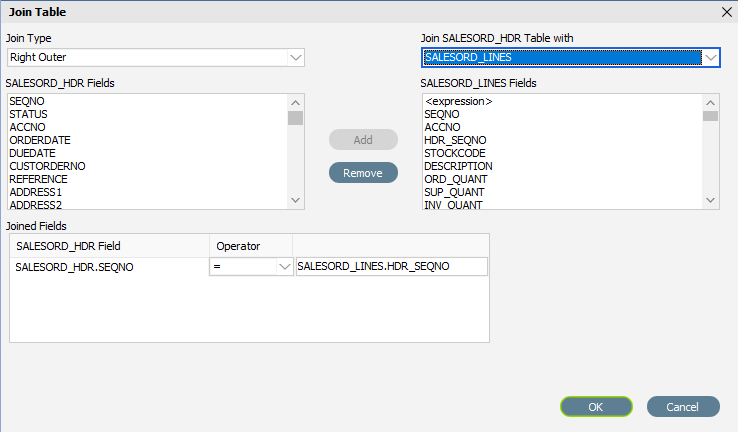
In this example, the table SALESORD_HDR will also be added as a third table. Double-click on the table name to bring up the Join Table window.
The existing table (yyy) defaults to the bottom table on the selected list - and this is STOCK_ITEMS.
But since SALESORD_HDR should be linked to SALESORD_LINES, simply select SALESORD_LINES from the drop-down box to change this selection.
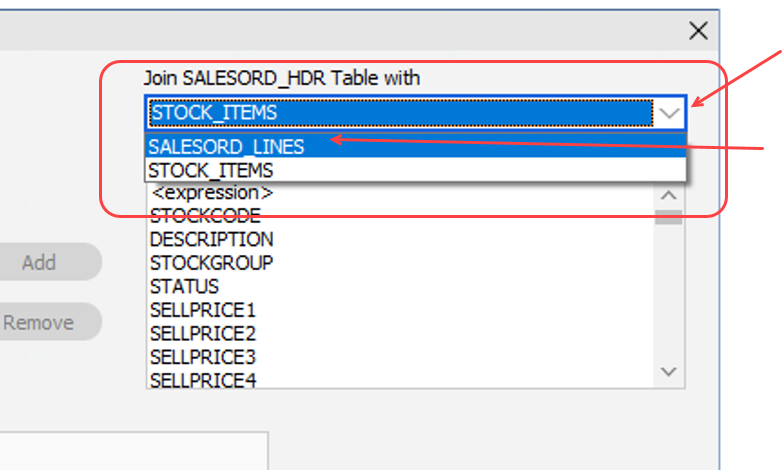
You will see that the (yyy) Fields list changes to reflect the SALESORD_LINES table.

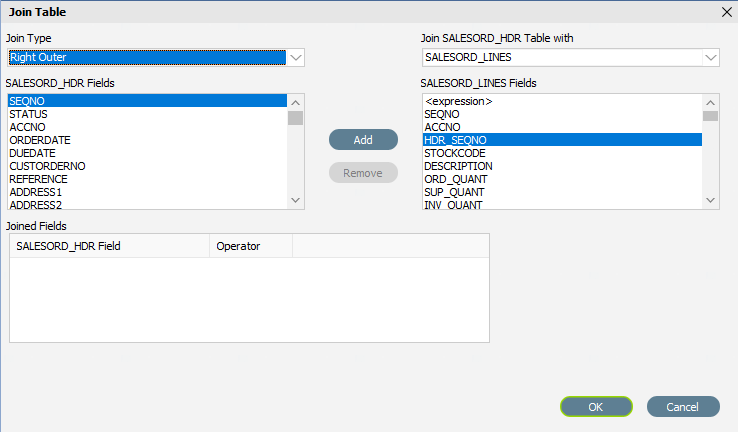
Repeat the process of removing the default join suggestions from the Joined Fields display pane, and set your own join as above. In this example it is SALESORD_HDR.SEQNO and SALESORD_LINES.HDR_SEQNO, with a Right Join - since I want SALESORD_HDR to be the ultimate primary.
Once you are happy with your selections, click OK to save, or Cancel to back-out.
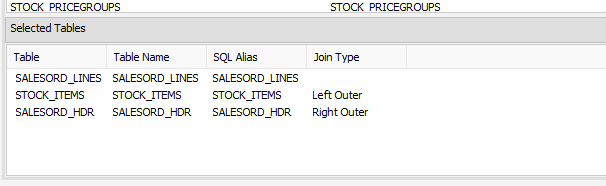
In this example, my selected tables are as displayed below.
Continue to add tables as required.