Workbook Dataview - Link Button - Excel File Definitions
The second or alternate way of creating and maintaining a Link between the dataviews, is by the use of the Link button.
There is no Link tab within the definition itself, so any Link needs to be forged on the designer canvas. The Link button is only available and accessible off the design canvas, for a definition dataview that is able to be linked to another dataview.
With a definition holding more than one dataview, the Link button on every dataview is initially active.
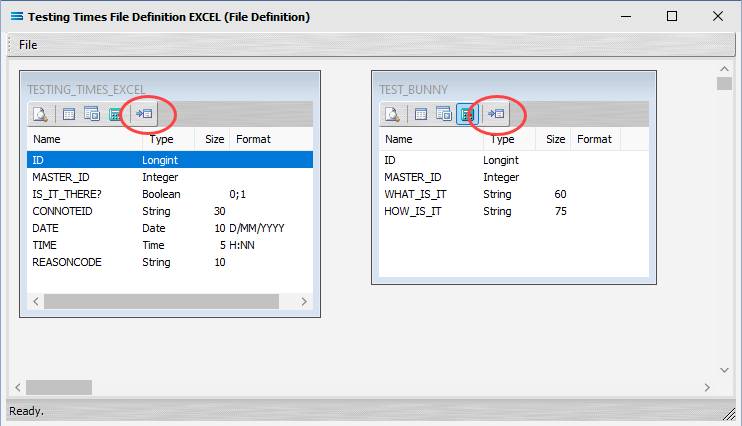
Whichever dataview has the Link button that you click on, that dataview will become the linked dataview (detail) - not the Master (primary) dataview.
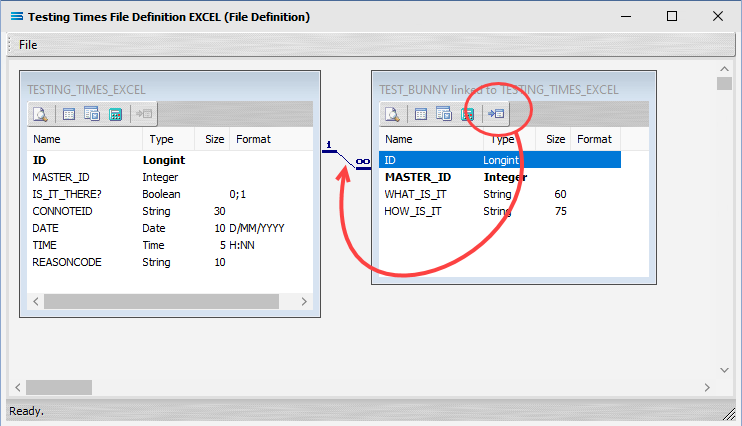
Clicking this button opens the Link window, as below. Where there are only two ( 2 ) dataviews, the name of the Master dataview to be linked into will automatically populate the settings window.
While in theory you can link any field in one dataview to any field in any other dataview, it is usual to only link a MASTER_ID to the ID of the dataview being linked into.
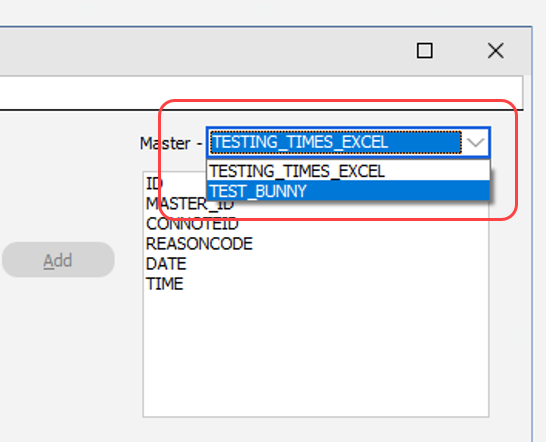
But you can also have multiple dataviews to chose from for your link.
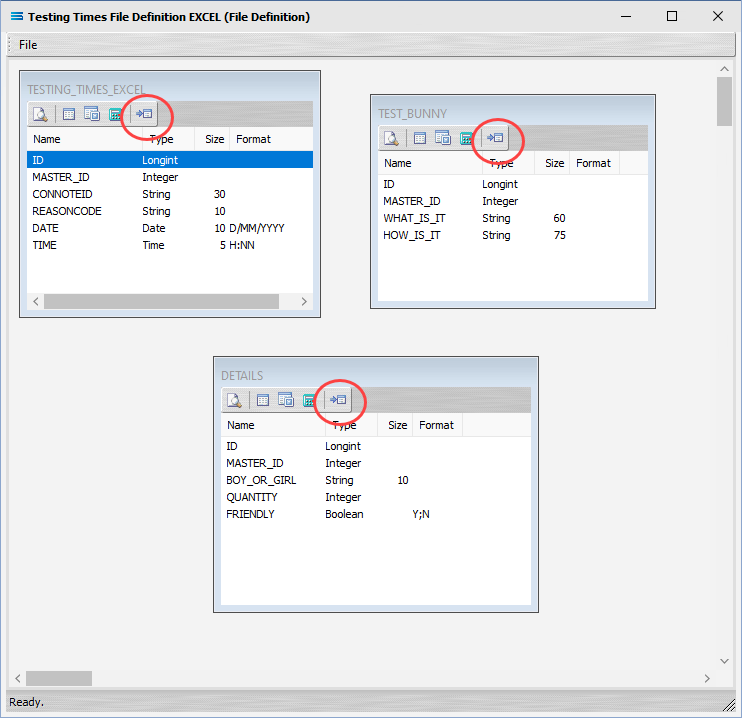
In this following example, the DETAILS dataview has been selected as the link, leaving the TESTING_TIMES_EXCEL and TEST_BUNNY dataviews available for selection as the Master (primary) dataview that is to be linked to.
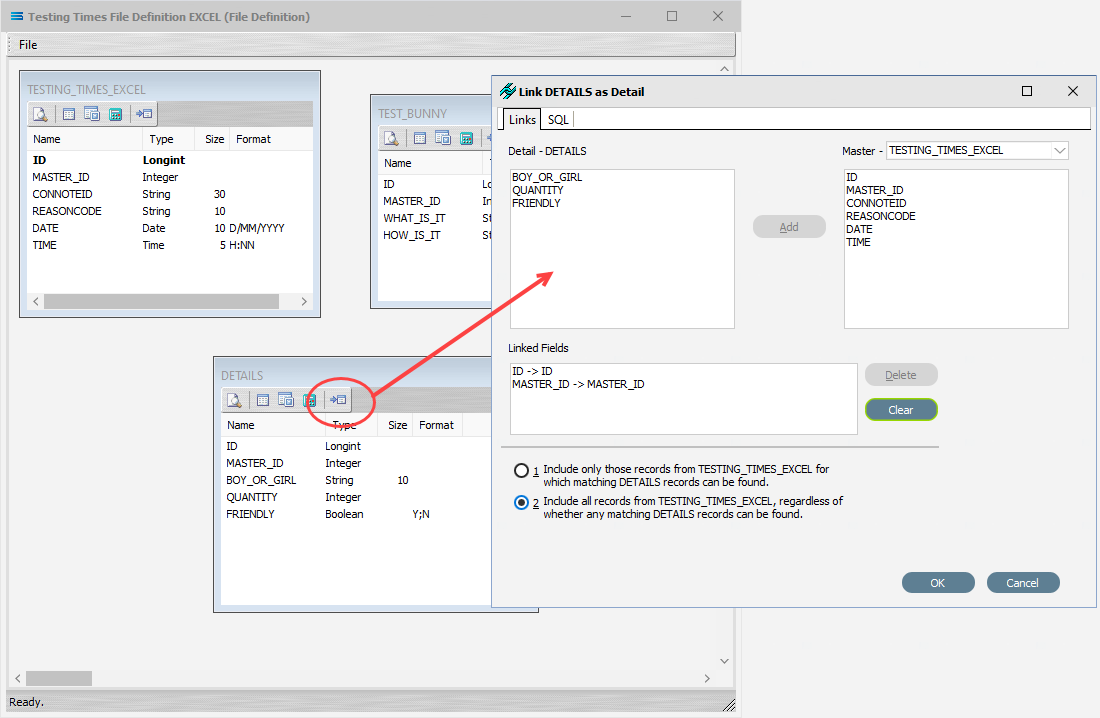
The colours of the link lines have no meaning.
They are random and arbitrary.
The colours of the link lines may be different every time that the definition is opened and the dataviews are viewed on the designer canvas.
Fields
Field Name | Description |
|---|---|
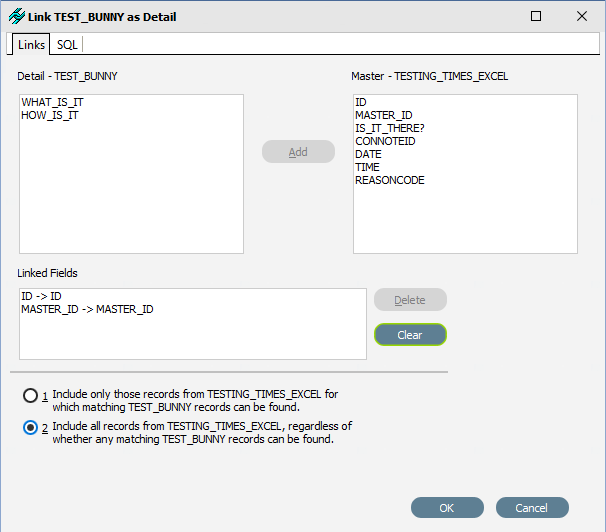
Detail - <linked dataview> | A list of the fields in the dataview that is linked to the Master dataview. These fields belong to the dataview holding the Link button you clicked on. These fields are available to be selected to link to fields in the Master dataview. |
Master | A drop-down list of the available dataviews that can be linked into. This list is only available where there are more than two (2) current dataviews available. |
Master - <primary dataview> | A list of the fields in the Master dataview that is linked. These fields are available to be selected to link to fields in the dataview. |
Linked Fields | Shows the links that have been made between the fields in the dataviews. |
Links Tab Buttons
Button Name | Description |
|---|---|
Add | Add a link. A field from both the Detail and Master lists will need to be selected before this button is activated. Once clicked, the fields will appear in Linked Fields. |
Delete | Click to Delete a link. The button will activate only if a link is selected and highlighted in Linked Fields. |
Clear | Click to Clear any and all field links. It severs all linkages made up to that point. |
1 | Include only those records from the Master dataview, for which matching records in the linked dataview can be found. |
2 | Include all records from the Master dataview, regardless of whether any matching records can be found in the linked dataview. |
OK | Click OK to save any changes you have made. All changes will be lost if you do not click the OK button. |
Cancel | Click to Cancel any changes you have made. |
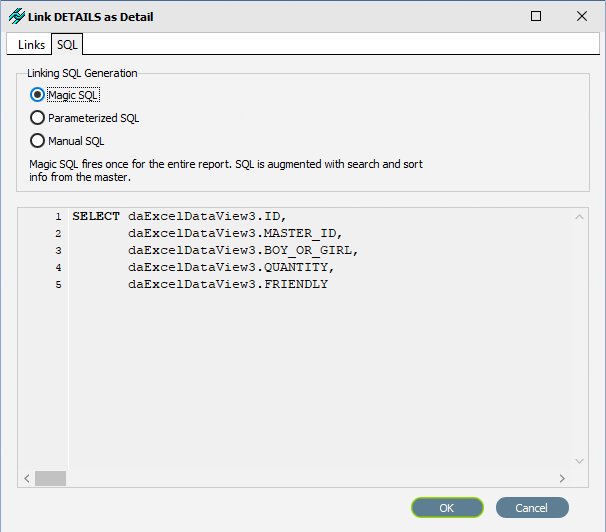
SQL Tab
While you are able to change the Linking SQL Generation by selecting the appropriate radio button, the SQL code itself is displayed only, and cannot be altered in this window.
SQL Tab Buttons
Button Name | Description |
|---|---|
Magic SQL | To activate Magic SQL, click this radio button. By default it is already selected. Magic SQL is powerful auto-generated hidden smart scripting feature that enables Statelake to keep track of the relationship between parent and child records across tables in a data definition. For more information, please review Introduction to Magic SQL. |
Parameterised SQL | The SQL code fires each time the master record position changes, where the SQL is augmented with a parameter linked to the master record. |
Manual SQL | The SQL code will be manually entered and stay as entered. |
OK | Click OK to save any changes you have made. All changes will be lost if you do not click the OK button. |
Cancel | Click to Cancel any changes you have made. |